Creating recovery drive for Your computer
You are probably aware of the situation where your computer deserts you at the worst possible moment. However, getting your computer to work again after a crash is not a fun thing to do when you accidentally destroy your code that took you commissions a lot of time. A recovery drive is a must-have gear for me. If ever, I hope I never have to use it, but I am always happy that I have it.
Step by step, I’ll be the one to guide you in getting your recovery drive. While it may seem inconceivable to others such as yourself, it is a more straightforward procedure than you would imagine. And, incidentally, it is the ideal thing to have, that is, a fail-safe option for your PC. Ol’. So, the aim of our first activity will be to follow the practice of backing up. Trust me, your future self will thank you!
Understanding Recovery Drives
A recovery drive is pretty much like a second key that you have to use to start your car. It helps you release and repair your PC computer, which was hacked when everything was going badly. The recovery tool, which is a simple OS USB stick, stores a system image of your Windows software. Through this tool, if your computer happens to have been down, you will be able to either restart the system or recover the data through the specific “reload” option. In a way, a virtual safety net is used.
Recovery drives are of two types: portable USB and system partition. The journey of USB drives is such that they are transportable and are operated easily. Moment when you be happy that your computer is again standing on its legs, the next moment system partitions exist on your hard drive. Both of these are the same – fixing the problems your PC might have. USB drives is a better choice, the reason is that they can be damaged more easily if your PC malfunctions extremely.
Why You Need a Recovery Drive
If you asked me, I bet you wouldn’t confront the notion of a recovery drive as a completely necessary matter. But knowing how it gloriously problems. It’s something like carrying a small version of IT with you in your pocket.
One time I knocked down a cup of coffee on my laptop as a result, my screen went black. When that happened, no thought came to my mind except panic. Then I remembered the recovery drive I had made. Woohoo! It enabled me to bring my computer back to life and thus protect my precious data. And since then, I haven’t stopped boasting about the existence of these little safety nets.
Preparing to Create Your Recovery Drive
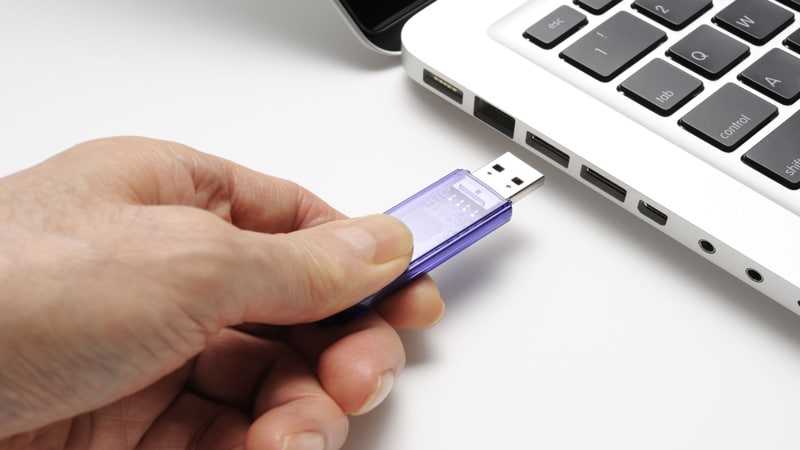
First things first. We shall gather our arsenal before blasting off. First off, you will require a USB drive. This should be at least 16GB in size. Smaller drives cannot meet all the requirements. The second one involves your PC. Make sure it is plugged in. We do not want to fail during the process. Moreover, make sure you have turned off all other apps. This work needs your PC’s full presence.
One word of caution! Your creation of a recovery drive will invalidate all data previously on your USB stick. Therefore, back up your important files even before starting. The old advice still holds true. So, be gusseted for the challenge ahead. Start working on it right now!
Step-by-Step Guide to Creating a Recovery Drive
Ok, let’s make that recovery drive. So the first step is to connect your USB to your computer. Then press a combination of keys on your keyboard. The Windows key has to be pressed and then you should type “Create A Recovery Drive”. Choose the search result that is relevant to what you have looked up. When the window emerges, put a tick on the field that says “Back up system files to the recovery drive”. Click on Next.
Windows will then proceed to detect your USB drive. When this is done, click it and proceed with the device mounted. You will then receive a warning that everything on the drive will be deleted. You can create if you are sure that you have saved all important documents elsewhere. Sit back and let Microsoft Windows do the necessary. This may take up to hours, so go ahead and grab your favorite coffee cup.
After the job is finished you have to see the message “Recovery drive is ready”. Press Finish and that’s all, your recovery drive is set.
Testing Your Recovery Drive
Step one is to monitor the correct functioning of your freshly created biosphere box. Just imagine it as the fire drill for your PC. It’s more fitting to test it now than having the problem hit you in the face. The following are the necessary steps we will take:
In the first place, you restart the computer and boot from the USB drive. You may be faced with a situation where you’re asked to press a peculiar key during the startup cycle, for example, F12 or Del. The key varies with different computers. Refer to your manual if you’re being to doubt. Once inside the Windows Recovery Environment, go earlier and have a look but don’t do anything until now.
Second, explore the different ways of recovery. Can you find options such as “Restore from system image” or “Reset this PC” in the menu bar? If the test is a positive one then good! Your drive is functioning as it ought to. Don’t REALLY do anything just be mindful that they are there when you are checking whether they are available. Once satisfied with your exploration session, eject and reboot normally just as you do every day.
In line with this, this exercise is more of a practice. It seems like checking whether the umbrella works before it rains. You ought to have the peace of mind that everything will work well when you need it most.
Storing Your Recovery Drive Safely
And so, here is the homemade lifebuoy. Well, the first thing to do is to ensure that your lifesaver is properly installed. Regard your recovery drive as something that you value very much. Put a cool and dry case, keep it away from magnets and never expose it to the sun. Meantime at home, it exists in a small, padded container that is lying in one of my desk drawers.
Do not leave out clear information on the label to your drive. Indicate “Recovery Drive” and its date of creation first. This makes it easy for you to recall when it is not recent. However, do not forget to update your recovery drive regularly, for example, every six months. Windows updates can change things in your OS, and you still want your recovery drive to be compatible with the current system.
Know where it is stored and then store it there. It may sound funny but in a hurry, you may forget where it was. In one instance, I spent almost an hour looking for mine during a PC crisis. I have since made it a habit to keep it in the same place. Pick a spot like a clear area that is close by for convenience and make it a normal thing to always leave it there.
When and How to Use Your Recovery Drive
First, what is it anyhow? Your recovery drive is basically the last solution you have when Windows jams on booting. If you encounter one of the following errors, then, you can go for the recovery drive: reboot problems, file transfers, and so on. Through Windows applications, systems may be set to prior states again.
You plug your recovery drive to a USB port on your computer then you restart your PC. Do you remember the key combination we used while testing? Try it again to boot off the USB drive. In the recovery environment, you will see various options. “Restore from a system image” imports your system back to a previous state, in case something got wrong. “Reset this PC” is a more radical one –it basically reinstalls Windows letting you keep your files or not.
Choosing the right option is another thing that you will have to focus on. Start with trying the easier / less severe choices. If the need arises, you may always choose the next level of recovery that may need you to back up. Also, be reminded that your files may be corrupted during the recovery process so it is a good idea to keep a backup of your important files.
Alternatives to Recovery Drives
The idea of a recovery drive is awesome, but we have many other aces up our sleeves. Below are other options you might want to consider:
System Restore Points are something like the bookmarks, which were contained in the PC’s state. Windows makes these automatically or you can manually create some. They are the quick fixes you apply when you encounter problems that were caused by some recent change. Nonetheless, if the operating system is totally down, System Restore Points are out of help.
If the cloud is another alternative. Services like OneDrive or Google Drive store your information offsite for safety. This is a great security mechanism but the only issue is it cannot help you with OS re